Showing posts with label crafts. Show all posts

Friday, December 12, 2014

FEELING CRAFTY AGAIN !!!!

Hi everyone,

It feels good to be back again. I've been meaning to get a blog post up for awhile now and then life happened and I'd keep pushing it to the back burner. Well, after this past week, I decided I need to get my creative juices flowing again and just go for it :) :) I'm so sorry that I haven't posted anything in a long, long time !!!!

Here on the coast of California, we've been going through a super storm of sorts.  It was much worse in the San Francisco Bay area then it was here in Monterey, but we were prepared and well-informed via weather services on Facebook, radio, tv etc.

Today was my day off from work this week and I decided I wanted to have some crafty  fun.  Well, I didn't actually start a project, but I did find a few craft items that I was intentionally looking for and whole bunch of stuff that I hand't planned on. You know how it goes. There's hidden craft stashes everywhere in my house...LOL :) :) :)

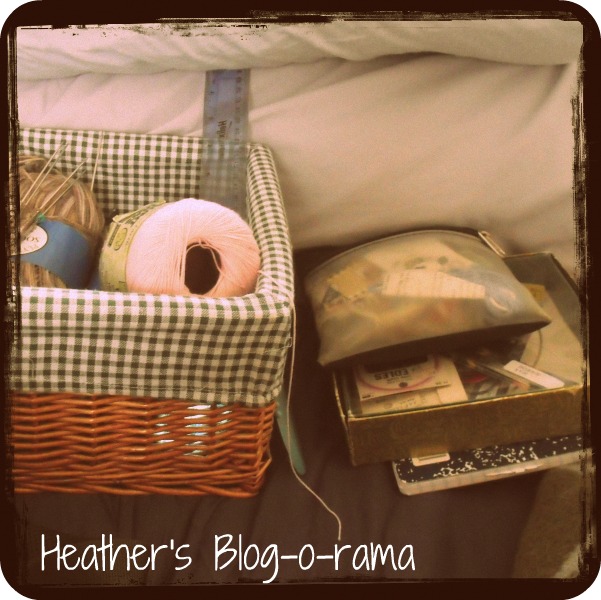
Below is a photo of just a small fraction of what I found. I just threw it on the futon couch and took a photo. Tonight, I'll sort through it all and see what I what I can make out of all this stuff.

What prompted me to search for some craft items was my "Lace in the Attic" book. It's a whole book full of knitted Victorian lace edgings. I don't think the book is available in print anymore. My copy was purchased at a used book store years ago. Then I found all of this other stuff, including a finished pink lace edging that I had knit....probably to be used in a project for a shelf liner? I don't even remember now.  It would make a cute edging for a pillow case or something.

As I was going through my closet looking for some things, I decided to also go through my grandmother's old wooden sewing box.  It was something that I inherited after she passed away. One thing I remember using when I was a young girl, was this crimson red velvet pin cushion that her mother (my great-grandmother) had made using an old canning jar rim and ring. 

I took all the straight pins, and other things off of it, cleaned it up and put everything back on it. 


 It was really dusty from not having been used in years. In fact, I think the last time it was actively used was before my grandmother passed away in the mid-1990s.  Other than a little rust around the lower edge, it's still in great shape.  I always loved this pincushion and I have it on display on top of the wooden sewing box. 

I've always wanted to make my own and I will someday. However, I noticed that if it's made from an old canning jar rim, then maybe I have a glass Mason jar that would fit it?  Keep in mind, I have no idea just how old this pincushion is. I think my great-grandmother made it before my father was born, but I'm not entirely sure about that one.

In any case, I raided one of the cabinets in the kitchen, grabbed an empty wide-mouth glass Ball jar and voila, instant Mason jar/pin cushion thing....so cute and it was free :) :) :)  The lid doesn't screw down all the way, but enough that it'll work for this project of mine.  I think it looks cute, don't you?


Here's another view of my glass Ball jar with my great-grandmother's pincushion sitting nicely on top.


That's my little craft project for the day. Oh wait, there is one other thing. You'll notice that my Ball jar pincushion is sitting on top of a white lacey curtain panel. I have two of those and they were purchased from Rachel Ashwell's Shabby Chic line at Target.  They were originally curtain panels, but I haven't used them since I moved back to the Monterey Bay peninsula. 

I am debating about what I can make with them. Here's a close up of the beautiful lacey edging. Any ideas?


I couldn't bear to part with them because they're so lovely. They are a little faded and yellow with age, but I think with some loving care in the washing machine, they'll bounce back. 

That is the news from the ocean shores of a very rainy California coast today.  Please feel free to "visit" and leave a comment here on my page. I really do enjoy hearing from all of you :)  Love and hugs,  Heather :) :) :)

P.S. Do any of you know how I can change my font, so it's cuter and looks more like someone handwrote instead of it being a plain generic font like the one I'm using now? It's been such a long time, since I put up a blog post, I don't remember how to change the font anymore.

Also, I'll be in the very slow process of overhauling my blog by myself, until I can afford a professional service. I already have a great business in mind for that.  So there will be some changes coming to my blog, too, including changing the blog name and the photo header :) :) :)


Friday, June 22, 2012

HEATHER'S "MAGICAL BLUE SOCKS" WITH TUTORIAL - PART 5

Hi everyone,

So this will be the last and final post in my series on the "magical blue socks" tutorial. Socks are really easy to knit and once you know the basics, you can customize the socks to fit any size foot. 

If you want to catch up on all of the previous posts in this series, please click on the links below:

Heather's Magical Blue Socks with Tutorial - Part 4

Heather's Magical Blue Socks with Tutorial - Part 3

Heather's "Magical" Blue Socks with Tutorial - Part 2

Heather's "Magical" Blue Socks with Tutorial

Now the last thing to do is shape the toe and close it off. 

At this point,  I put all the instep stitches from needle three onto needle 2.  So I work with only 3 double-pointed knitting needles when I'm shaping the toe.

SHAPING THE TOE:

Round 1:

Needle 1 - Knit to last 3 stitiches, knit 2 together, knit 1

Needle 2 - Knit 1, ssk (slip, slip, knit), knit to last 3 stitches, knit 2 together, knit 1

Needle 3 - Knit 1, ssk (slip, slip, knit), knit to end.

Round 2: Knit even all the way around

Just repeat these two rounds till the toe measures 1 1/2" long.  In my case, that was a total of:

22 rounds


All that is left to do is close the toe, so you can actually wear your socks.

There are different methods of doing this, but my all-time FAVORITE is the "kitchener stitch".  It keeps that knit stitch going and has the smoothest finish I've seen so far.

This is how to do it:

Knit stitches from Needle 1 onto Needle 3.

Hold double-pointed knitting needles with purl sides together.

With your yarn needle, draw the yarn through first stitch on the front needle as a purl and leave ON, draw yarn through first stitch on back needle as a knit, and leave ON:

Now here's the rest:

Step 1 - Draw yarn through first stitch on front needle as a knit, slip OFF.  Draw yarn through second stitch on front needle as a purl, leave ON.

Step 2 - Draw yarn through first stitch on back needles as purl, slip OFF.  Draw yarn through second stitch on back needle as knit, leave ON

All you do is repeat steps 1 and 2 across.  Then tie knot at the end and weave in the yarn end.  It's that simple ;) :)

Some people like to block their projects, I do not...especially when it comes to socks. I'm putting the socks on right away..and if they're knit to the correct measurements they WILL fit. 

If you have any questions about the instructions or need some help, please let me know. I'll do my best to help answer your questions :) :)

With that, I'll leave you today with this nice photo:


This was a rose that was part of my dad's Father's Day bouquet.  I think it's really pretty. 

That's the news from the ocean shores of California today.  Love and hugs, Heather.

Wednesday, June 6, 2012

HEATHER'S "MAGICAL" BLUE SOCKS WITH TUTORIAL - PART 3

Hi everyone,

I hope you are doing well today. Here is the next installment in my sock-knitting series.  If you want to see the previous posts, you can click on the links below:

Heather's "Magical" Blue Socks with Tutorial - Part 2

Heather's "Magical" Blue Socks with Tutorial

Now it's time to knit the heel flap.  That's the part that's like the "back of the chair" for your heel:


HEATHER'S HELPFUL HINT: If you can't or don't want to use reinforcing sock thread, another way to add a bit more firmness to your socks is by switching to a needle size that is one size SMALLER than what you're using for the rest of the sock. It adds a little more strength and density to the parts of the sock that get the most wear and tear.


So take the stitches from Needle 2 and place them onto Needle 1.  Also, very important for the heel flap SWITCH to Size 00 US ( 1.75mm) double-pointed knitting needles for the heel flap.  You'll continue to use these same needles when you begin to turn the heel as well.

Row 1 - sl 1 (slip 1 stitch), knit 1 across

Row 2 - purl all the way back

Repeat both of these rows until the heel flap measures 1/2" inch LESS in LENGTH as it does in width.

In this case, the stitiches from Needles 1 & 2...when knit in this way, measure 3 inches across. So that means my HEEL FLAP will be knit in this pattern till it measures 2 1/2" inches in length.

So for my feet that means you'll continue this way until you finish: 44 rows total.


Now it's time to TURN THE HEEL:


This part can be really easy, and also a real "stinker" if you're not careful while knitting.


HEATHER'S HELPFUL HINT: You should have an even number of stitches, since you originally cast on a number of stitches that were a divisible by 4 and 8.  It needs to be an even number in order for this to turn out correctly.

Row 1 - Knit 2 stitches past the center, SSK (slip, slip, knit), knit 1, place stitch marker here, and turn the work.

HEATHER'S HELPFUL HINT: SSK (slip, slip, knit) is really easy. All you do is slip 2 stitches to the right-hand needle as if you're knitting them. Then with the left needle, come in through the back of both loops and knit them TOGETHER.

Row 2 - Slip 1, purl 5, purl 2 together, purl 1, place another stitch marker here, and turn the work.

HEATHER'S HELPFUL HINT: The use of stitch markers does require a little bit of extra work, but you will be over the moon HAPPY, EXTRA DELIGHTED, because this will ensure that you don't miss any stitches and the "heel turn" will turn out properly.

Row 3 - slip 1, knit 6, SSK (slip, slip, knit), knit 1, and turn the work.

The row markers mark the space in the GAP between the two stitches that you will either be knitting together or purling together.  This is the part that helps turn the heel.

Row 4 - Slip 1, purl 7, purl 2 together, purl 1, and turn the work. Continue in this fashion until you've worked all the stitches on your knitting needle.

Keep in mind that the very LAST knit and purl rows, you'll only be knitting or purling the stitches together. You will NOT have to do the extra knit 1 or purl 1 before turning the piece.

That is it for today's knitting lesson. If you have any more specific questions, please don't hesitate to leave me a comment here. I'll do my very best to help you :) :) :)

Until next time, I will leave you with this photo for the day:


I bought this teapot with matching teacups and saucer's at an auction. It was part of a collection of random pieces.  I'm actually trying to sell these.  The teapot is from a company called SAJI in Japan.  The teacups are from Radfords of England. it's interesting because the patterns are almost exactly the same.  It's really lovely, but I need to declutter some things.

I've decided that my personal FAVORITE is anything that is Royal Albert or Prince Albert patterns. Right now, my all-time FAVORITE pattern is Royal Albert "Old Country Roses".  I have a creamer with matching sugar bowl with lid in that pattern. That was in that same auction lot as this violet teapot with matching cups/saucers.

That is the news from the beautiful ocean shores of California today. Love and hugs to your day today, Heather ;) :) :)


Wednesday, May 30, 2012

HEATHER'S "MAGICAL BLUE SOCKS" WITH TUTORIAL - PART TWO

Eeeek...squeals of delight. I finished my "magical blue socks" last night.  However, I won't show you all the photo till I'm finished with the tutorial.

If you want to see part one of my "magical blue ribbed knit socks" tutorial, please click on the link below:
Magical blue ribbed knit socks with tutorial

Today we'll be knitting the ribbed knit cuff part of the sock.  I decided to go with the "stockinette stitch" test swatch when figuring out how many stitches I needed for my ribbed knit cuff.

Why?

Glad you asked.  I don't like slouchy socks, so I wanted to make sure they held up nicely.  So if you remember back to the previous post, my test swatch in stockinette stitch came out to 1" inch = 9 stitches. 

I rounded down to 10" length around the calf, again because I like my socks to fit well.  So 10" inches around multiplied by 9 stitches to the inch = 90 stitches.

When knitting, I like to make sure that I'm working with a number that is a multiple of 4 and 8. It makes the knit piece so much nicer and easier to work with.  In this case, that number is 88 stitches. I always round the number DOWN.


COOL TIP: For added "elasticity" and  strength in your knitted socks, try knitting the initial beginning of the cuff using double pointed needles that are one size SMALLER, then the needles you plan to use for the main portion of your sock project.

So find a set of Size 00 US (1.75 mm) double-pointed knitting needles.

If you're like me, you have about three sets laying around the house.  Just don't sit on them. It hurts. Been there, done that...for real. Ouchie.

Okay, so with your Size 00 US (1.75 mm) double-pointed needles, cast on 88 stitiches.

COOL TIP: For a nice, loose cast on that is not too tight, hold TWO of these double-pointed needles together when casting on your first set of stitches.  As you continue to knit your socks, the tension will tighten up just a bit, and be just perfect.  Otherwise, if you don't do that, you run the risk of it being too tight.


Now that you've cast on the 88 stitches, you want to carefully join it together in the round. Make sure that the stitches are all pointing the same direction, so that you don't end up with one of those mobius-things.

With your Size 00 US (1.75 mm) double-pointed knitting needles, knit a ribbed stitch as follows:

knit 2, purl 2

Knit that around for a total of 7 rows.

At the beginning of Row 8, switch to larger Size 0 US (2 mm) double-pointed knitting needles.  Continue in the knit 2, purl 2 ribbed pattern until the cuff measures 4" inches in length from the top. In this case, you'll continue in this pattern until you complete a total of 50 rows.

I chose a short cuff because I only had one skein of this sock yarn and my feet are gigantic. So I wanted to make sure there was enough yarn to cover both of my feet.  This is why I made the cuff nice and short. Here is what my cuff looks like after I had reached the 4" inch cuff length:


That's enough for today's lesson.  Next time I'll show you how to knit the heel flap and shape the heel.  I've got some cool tips/tricks for doing this, too. Oh and it comes from making many, many mistakes. No matter. I LOVE knitting.

Again, let me know if you have any questions whatsoever. If I need to explain anything in more detail, I'll be happy to do that for you.

With that, I leave you with this photo for the day:


That's a photo of my vintage Foley Sift-chine triple screen sifter. Isn't it CA-UTE? I LOVE vintage stuff. This one is from the 1960s. I purchased it at a yard sale awhile back.

That is the news from the ocean shores of California today.  Love and hugs to your day today, Heather


Wednesday, May 23, 2012

HEATHER'S "MAGICAL BLUE SOCKS" WITH TUTORIAL

Hi everyone,

Okay, I'm back with a sock tutorial.  I've been knitting myself a pair of blue ribbed knit socks for myself.  I thought this would also make a really nice tutorial. So here I go..wish me luck.  I'll be sharing a little bit each week. Before I get to the sock tutorial, I wanted to show you a photo of one of the finished knee-high ribbed knit socks that I made for my father:


There was some "shaping" involved in the cuff, which meant increases and decreases.  That went well. I'm not sure if I did the increases and decreases in the right spots. In fact, I'm pretty sure I did NOT, but I did achieve the end result I was looking for. My dad tried it on and laughed. He was so happy because the socks fit perfectly.  The sock looks "small and skinny", but they stretch to fit, and it was like sand in an hourglass. Absolutely perfect fit.

Okay, now for the good stuff.  Here's my "tutorial" on how to make socks.  The pattern that I'll be giving here are socks to fit my big Size 11 feet.  Actually, they're more like a size 10.  However, my feet are really wide, so I usually have to wear a size 11 shoe.

The first thing that you want to do when knitting custom-fit socks is to measure the feet of the person you are knitting the socks for. In this case, I'm making myself a pair of socks.  There are THREE things that you want to measure:

A) Length of the foot (from the back of the heel to the end of the big toe)

B) The diameter of the calf (where the top of the cuff will be).
- in this case, I measured the diameter of my calf about 4" inches from the top of the heel. I'm making these socks to wear with my Teva walking sandals.

C) Ball of the foot (measuring the circumference around the widest part of the foot)

When I take the B and C measurements, I ALWAYS take those measurements standing up.  The numbers will always be more accurate and realistic that way.

So just how GIANT are my feet?  Here's what I came up with:

A) 10 1/2" inches long

B) 10 1/2" diameter around the calf (measured 4" inches from top of heel)

C) 9 1/2" inches around ball of the foot.

The next thing to do is to choose a sock yarn that you like.  I happened to have this in my knitting stash, so I wanted to use it up. This is a German sock yarn that is mostly wool with a bit of acrylic mixed in. This is really nice because it makes the socks washable. You also don't have to add reinforcing thread in the heel or toe, unless you want to, since the yarn already has some acrylic built into it:


The yarn I am using here is called "Zauber Wolle" That means "Magic Wool" in German. This yarn is not cheap, BUT it has the ABSOLUTE BEST color transitions of any variegated sock yarn I have ever seen so far.  This is enough to make one pair of socks with a short cuff.  Oh, also gather some knitting needles, a ruler, a DVD to watch while you're knitting.  Here's a slightly closer photo of the yarn that I'm using for these socks:


I'm just loving these different shades of blue.  I'll be using two different sizes of double-pointed knitting needles. However, you don't need to worry about that till the next lesson. Today I'm just going to talk about knitting a gauge swatch to figure out how many stitches you'll need for your socks. 

I am using Size 0 US (Size 2 mm) double-pointed knitting needles for my socks. 

I knit TWO different gauge swatches.

The first one is in "knit 2, purl 2" ribbing for 32 stitches across times 42 rows.  The result was:
1" inch = 16 stitches across

The second gauge swatch was knit in stockinette stitich (knit across and purl back) I also knit 32 stitches across times 42 rows.  The result was:
1" inch = 9 stitches across

This is what my "rib stitch" gauge swatch looked like:              


I like my socks to be custom fitted. I also don't like socks with cuffs that slouch around my ankles.  That was popular in the 80s. Been there, done that, don't want to do that again. So, I'm after a nice-looking cuff that will fit nicely around my calf.  So in this case, even though I had 16 stiches to the inch when using the rib knit pattern, I decided to go with the stockinette stitch gauge for figuring out how many stitches I need to knit the cuff of my ribbed knit sock.

I subtracted 1/2" inch from the measurement to get a nice fit. In this case, my calf is 10 1/2" around minute 1/2" inch = 10 inches. 

Take the number 10 and multiply that by 9 stitches to the inch = 90 stitches.

I ALWAYS use four double-pointed needles whenever I knit something in the round, and knit in with the fifth needle. You get a much nicer garment that way with less stress at the corners on the those stitches.  That is something I learned while living in Scandinavia. 

I also like to make it a number that is divisible by 4 and 8 so that I have an even number of stitches to work with.  In my case, I rounded DOWN to 88 stitches.  It's a nice even number AND it works with my "knit 2, purl 2" ribbed knit cuff.

That is all for today's sock tutorial.  Next Wednesday we'll actually start knitting the sock itself. So practice knitting your gauge swatches. If you have any questions, please let me know.  I'll do my best to answer your questions.

I'm also a really experienced sock knitter. I've been doing this for over 12 years now. However, this is my first time teaching someone else how to knit socks. So please let me know if there's something I need to explain better for all you sweet readers.

Until then, I leave you with a photo of these beautiful, pink flowers that I photographed a few days ago:


I'm just loving all of those different shades of pink. 

That's the news from the beautiful ocean shores of California today.  Love and hugs to your day, Heather 

Wednesday, May 9, 2012

DAD'S RIB KNIT SOCKS - REVISITED

UPDATE: on May 10th at 4:53 p.m.
Okay, I just want to remind all my sweet readers, that this is NOT a sock tutorial. This is just my experimenting, trying to find the perfect sock pattern for my dad :) :

I WILL actually be doing a sock tutorial as soon as I finish knitting this second ribbed sock.  In the meantime, I did pick up a really fun book of sock patterns at the library today. Inside was a pattern for a really nice tube sock.  I may try that pattern next for my father :)

I hope you are all having a wonderful day.  That's the news from the ocean shores of California today.  Love and hugs, Heather :)

Hi everyone,

Okay, so I finished the first sock.  It's not quite what I'm after in terms of the increases and decreases in the ribbed cuff. That's okay.  It fits my dad's foot perfectly. However, I only made the cuff 11 inches instead of 14. Ooops, totally forgot about that.  I'll post a pic of that sock at the end of today's post.

I started working on the second sock a few days ago. I'm changing the pattern slightly.  Again, I'm not exactly sure of what I"m doing, since I don't have a pattern to reference. So this is just something I'm making up as I go along.  I'll also include "instructions" on what I"m doing.  If you want to try this, you can. Just remember, this is not really a tutorial. Rather, I'm just sharing this, so if any of you more experienced knitters out there can give me some ideas/help, that would be greatly appreciated.  As of the end of  last night, I'd knit 2 inches on the ribbed knit cuff:


The two things you need first:
- sock yarn
- double-pointed knitting needles.

If you have questions about why I use certain things, just leave me a friendly comment. When I get ready to do an actual sock tutorial "officially", then I'll go more into the knitty gritty of why I like to do things a certain way.

Using Size 00 US (1.75 mm) double-pointed needles, cast on 120 stitches.

Knit 2, purl 2 in the round till cuff measures 1"
In my case, it was rows 1-12

On Row 13, increase to 128 stitches:
I did this: (knit2, purl2) x4, inc 1 purl stitch.

I repeated that whole process 6 more times.

Then I did this: (knit 2, purl 2)x2, increase 1 purl stitich

Then continue in ribbing pattern in the round, paying attention to those extra stitches.  I used "stitch markers" to mark off the different sections so I don't get confused.

Continue in this pattern until Row 24 = 2 inches (from top of cuff)

On Row 25, increase to 136 stitches.

On Row 25 I did this: (knit 2, purl 2)x4, purl 1, increase 1 purl stitch

Repeat that whole process 6 more times. Then:

(knit 2, purl 2), purl 1, increase 1 purl stitch

Continue following ribbing pattern, being mindful of the extra purl stitches till you complete Row 37 = 3 inches

On Row 38, decrease to 128 stitches this way: 
(knit 2, purl 2)x4, purl 2 together

Repeat that whole process 6 more times.

Then: (knit 2, purl 2)x2, purl 2 together

On Row 40 switch to Size 0 US (2 mm) double-pointed needles. Why?...because I forgot to do it at Row 38. Hee hee hee :) :)  I was watching "Anne of Green Gables" on my dvd player.

This is what the second sock looks like as of Row 42:


When I do my "official" sock tutorial, I'll be more mindful of how I write out my instructions.  You should see my composition book. It's a mess with all my notes.

I think this is a good place to stop for now, or else this post will go on forever and ever. That's not so bad when it comes to knitting.  This is a photo of the first sock that I knitted for my father.  The leg looks really skinny. Remember it's done in the rib stitch, specifically knit 2, purl 2 with some minor changes fr increasing and decreasing. It's got a really nice stretch to it. It fits my dad's leg perfectly.  Here is what it looks like:


I just loved seeing my dad's happy face when I finished the first sock. He doesn't say so, but I can tell he's really anxious for me to finish the second one. Everytime we're sitting in front of the tv, I'm knitting. He keeps sneeking peeks at what I'm doing :) :) Sweetness :) :)

Oh,  I'm reworking my "It makes cents to me" posts on Fridays.  I've got some ideas .

What else, speaking of my daddy, here's a photo of him walking my aunt's dog.  Aren't they cute?  I am so grateful that God spared my daddy's life:


This is my sweet daddy walking my aunt's dog.  I like to call her "my dog" while my aunt is away.  She's definitely a "sniffer", so when you take her for a walk, just plan on it taking a long time. 

That is the news from the ocean shores of California today.  Love and hugs to your day, Heather

Wednesday, May 2, 2012

DADDY'S RIB KNIT SOCKS - PART THREE

Hi everyone,

So  I'm "glad" that I ripped out 8 inches worth of ribbed knitting in the round to start all over.  This version is still not quite what I'm imagining in my head. However, it certainly is much better than the previous attempt.  As of Friday afternoon, this is where I was at with the cuff on the first sock:


I'm knitting like it's going out of style, trying to get these socks finished, while not ignoring my other household duties like eating and sleeping.


This is where I ended up last night after watching the "Hawaii 5-0" and "NCIS: Los Angeles" crossover tv event last night:


The sock looks really skinny, but remember that anytime you knit in knit2, purl2 ribbing, that it's super stretchy.  Plus, this is just an experiment in knitting. However, I know that my daddy will happily wear these socks once they're finished.

He was watching tv with me last night and kept looking over at me while I was knitting. He had a smile on his face. So even though he's not talking a whole lot about it, I can tell that he's excited to see progress on the socks ;) :)

That is the news from the ocean shores of the California today. I hope that you all are having a good day today. Thanks for visiting me.  Love and hugs, Heather

Wednesday, April 25, 2012

DADDY'S RIBBED KNIT SOCKS - PART TWO

Hi everyone,

I don't know about you, but this new Blogger interface is really difficult for me to figure out. Okay, enough about that, let's get to the fun crafty stuff.  This was the progress that I made on my father's ribbed knit socks since I last post here on April 11th.

This is what I did on Sunday:


I think here the cuff is about 3.5" inches long.  I hadn't done much work on the socks in the last few days. However, this day I decided to really be disciplined about this. Daddy needs new socks.  Oh, yeah, even my father said "That's it? That's all you've done?" YEP.


Our regular ride to church wasn't going that day, so we also stayed home.  Instead of being in church, we watched Pastor Greg Laurie online. I gathered all of my knitting supplies first:


It really was a lot of fun and really relaxing to be able to knit and listen to a nice message at the same time.  Our regular ride to church wasn't in town today, so that is why we ended up having to stay home. My father will be able to drive again in just a couple of weeks. He's recovered so well from his heart episode back in January.  So this is what we watched this morning. It's Pastor Greg Laurie of Harvest Church in Riverside, California. You can click here if you'd like to visit their site:


To my horror...embarassment, I couldn't find my cellphone. It might as well be a lung machine, because I feel like I can't breathe if I don't know where it's located. So my sweet daddy went looking for my cellphone while I'm listening to the sermon. The next thing I know, I look down into my knitting basket and find this:


It was in my knitting basket all along.  I told my dad right away that "I'd found it"  "What?"  "I found it".."Oh, Heather...(dad shakes his head and tries to frown, but is having a really hard time hiding a laugh and a smile)

These socks are proving to be really challenging.  The difficulty I'm having is figuring out where to increase and decrease the stitches while doing a knit 2, purl 2 rib pattern.  I know there's a way to do it, but I haven't found a satisfactory explanation anywhere.....yet. So that's why I'm kind of winiging it. That's okay. I love experimental knitting.  Maybe that's part of my "rebellious" knitting side. In any case, this is what I had last night, before I got so frustrated with how "wrong" it was turning out:


So last night while I was watching a re-run of "Hawaii 5-0"...dada da da da da... I unraveled that entire cuff, which by that point had reached almost 8 inches. I started over last night and worked on this some more today. My father, bless his heart, is being really patient.  This is what I have so far:


That's about it on the crafting front.  I really enjoy writing up a knitting pattern from scratch. It can be aggravating at times, but still a lot of fun.  I have been taking notes as I go along.  When it comes time to knit the second sock, I'll either follow the exact same pattern or alter it, until I find the right "formula" to achieve the look that I"m going after.

That is the news from the ocean shores of California today.  Love and hugs to you all, Heather

Saturday, March 24, 2012

IT MAKES "CENTS" TO ME FRIDAY - FOR SATURDAY - MARCH 24th.

Hi everyone,

Okay, so I'm late with this post, but late is better than "never" today.  Here is what I purchased this week.

A sweet friend called me up and asked if I needed a ride to the store.  I didn't "need" to go, but when a ride/opportunity presents itself, I've got to take it.  I told my friend that I didn't have a lot to buy, which was true. Would that be okay? She said "Yes".  So off we  went to the store. Oh, it is raining today, too.  We went to Whole Foods, where I love to shop.  That place has a lot of good stuff and a lot of culinary temptations, too. So you have to be careful when you walk into this store. 

Purchase on March 24th, 2012 - Saturday at Whole Foods: $21.04


- 20 oz. drip coffee with cream & sugar - $1.90 "want, not a need"
- 2 pastries (one croissant and one nutty sticky bun) - $5 "want, not a need"...and WOW, the price went UP.  It used to be $2.39 per pastry. So the "oodle" factor just went down, when the price went UP.
- Applewood smoked bacon, 18 oz.
- 1 Izze sparkling "grapefruit" drink (for Dad) - $1.49 plus $0.05 bottle return deposit "want, not a need", but Dad really likes these. I read the ingredient label and I was not horrifed by the ingredients...but it is a "treat", that's for sure.
- 1 Bar Gelato, coffee-flavored - $1.99 "want, not a need" My father and I saw these in the store the other day. They looked interested.  In terms of ingredients, these are fantastic. It's made with all real ingredients and things that a third-grader can easily pronounce.
- Local newspaper $0.75 "iffy" I think a newspaper is okay, since it's good to keep up with local happenings.


The bacon that we eat looks like this. It's a Whole Foods brand, and I trust it. Otherwise, I don't buy any other kind of bacon.  Although I've been on a bit of a bacon-frenzy lately. So I'll probably not buy bacon for awhile yet. It doesn't have nitrates or nitrites. I AVOID all meat that has nitrates or nitrites in them:


Oh, this bacon crisps up really nicely when cooked on a flat pan on a grill/barbecue outside. It's much nicer than frying it inside a pan in your home. That and it doesn't smell up the house like bacon.  It'll make your neighbors want to come over and have a meal at your house. 


The gelato bar was awesome. I just had a tiny taste of that and wow, simple ingredients make for the best tasting stuff.  This is what we bought.  Then take a look at the second photo and read the ingredients. It's so ultra simple and all foods should be made with easy-to-pronounce ingredients:


So this was just one of my purchases for the week of Saturday - March 17th to Friday - March 23rd. I didn't include all the other purchases I made this week, because it was more of the same stuff/junk.  I think this is my "low" for the week. That's okay, because that's what "tracking" my spending is all about.  It's about learning where my money actually goes, and what needs to be changed.

Here's another "purchase" that I made at Whole Foods last Monday. These particular items were FREE.  I was in Whole Foods, when a lady with long brown hair, pushing a shopping cart, stopped me in the store and asked: "Do you like Mrs. Meyer's Clean Day products?" Why yes, yes I do like them very much. She handed me two coupons, each was good for one FREE Mrs. Meyer Clean Day product, up to $5.99.  So I went over to the aisle that has all the nice soaps.  I wasn't planning on buying more soap, because they're expensive. However, I like Mrs. Meyer's bar soaps, because they're made with good ingredients.  The soaps are normally just over $6 each. As it happened, they were on sale for just $5.19 each...and since I had two "FREE" coupons, both bars of soap were absolutely FREE. That was a 100% savings. Isn't that the coolest.  Here are the two scents that I "purchased":

Just as a side note, Mrs. Meyer Clean Day products have some of the cutest, vintage-style labelling of any cleaning product I've ever seen. So they get a lot of "points" from me for good packaging. Oh, that and the fact that I've got personal experience using these products and they work very well.  So out of this entire week's worth of mostly unnecessary spending, this was the BEST item.

In other news, I'm working on knitting a pair of custom socks for my father. He wants a ribbed cuff that goes to his knee. So that's presenting a bit of a challenge for me. Okay, it's a HUGE challenge. I'm just "winging it" with the pattern to see what happens. I'm also taking notes as I go along.  If any of you know of a good on-line resource that specifically states how to increase and decrease while knitting a "Knit 2, Purl 2" rib pattern, I'd be greatly appreciative. I'll share that project with you in the next few days.

It's raining today.  Not right now...but earlier today it was really coming down. I read that Watsonville was going to have a 90% chance of rain today, so when I saw that, the chances are really 100% good that it would rain here, too.  The rain is such a blessing for everyone, especially the farmers.

That's the news from the ocean shores of California today. Love and hugs, Heather


Thursday, February 16, 2012

DIARY OF A MESSY, BUT LOVABLE CRAFT LADY

Hi everyone,

How are you all today? I'm doing really well. Yesterday I was suffering the consequences of eating some gluten-filled goodies on Tuesday. I was sick all day Wednesday. Today I'm feeling much better. That experience told me TWO things. One is that no matter how tasty something is, if I know my body can't handle it, I shouldn't eat it. Number Two (and positive aspect) is that the toxicity level in my body is going DOWN. That's why my body had such a strong reaction to the two croissants I ate on Tuesday.

Okay, now to the fun stuff.  It has been awhile since I've picked up my knitting needles.  When my dad went into the hospital, everything stopped. Oh, my dad is doing so well, now. It is a real miracle.  Now I'm feeling ready to start crafting again.  You know you are ADDICTED in love with crafting when you have multiple projects going on at the same time....a.k.a UFO's (unfinished objects).  So here is what I have to share with you today. Oh, and keep in mind, this isn't even HALF of the unfinished craft projects in my room.  This first photo is a pair of socks that I was knitting for my aunt for Christmas. The first sock is almost finished, plus I still need to knit the second. Oh, and the taupe colored yarn? Those are my dad's knee-high socks...can you tell? ha ha ha ha ha ;) :)


The next photo is a close-up of the variegated taupe yarn that I'm going to use for my Dad's knee-high socks.  Hmm...at this rate, they'll be ready just in time for Christmas 2012 :) :) I've never used this particular yarn before. I just remember purchasing it because the price was extremely affordable:


This next photo is a close-up of the socks that I"m knitting for my aunt. I LOVE knitting socks.  It is a fun thing to knit. Plus, it's an extremely affordable project on my "in between jobs" budget:


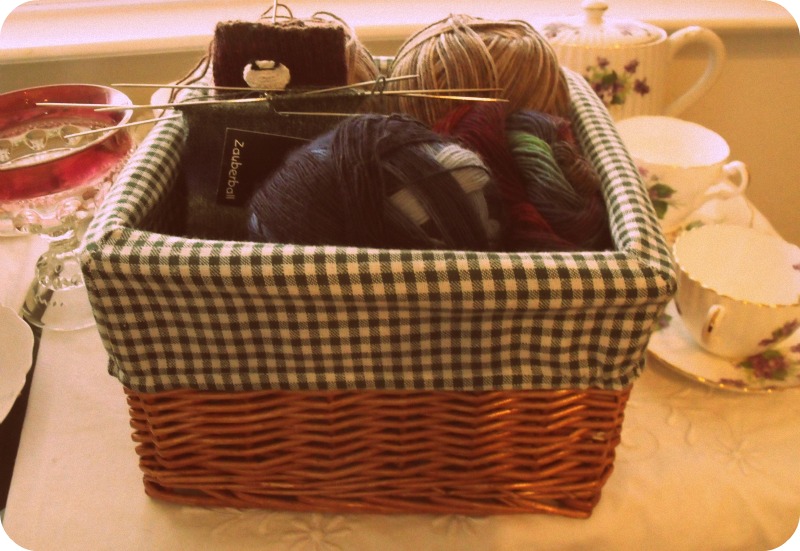
Maybe I can justify all my unfinished knitting projects if I disguise daintily place them in a lovely, vintage chic basket?:


Now talk about a project taking a long time. I started this quite a fe months ago. I don't even remember when I started this Victorian knitted lace edging, or even why I set the needles down.  Now that I'm back to crafting, this will finally get finished. Isn't the pink so pretty?:


Now, my walk-in closet is an absolute M.E.S.S...messy messy messy messy..and I WON"T show a pic of that till after it's looking neat and sparkly again. However, you know you've got it bad, when your craft supplies start spilling over into the closet in the tv room...like this:


That last photo were some craft items that I was going to use to try and make some stuff for the ladies in my Bible study for Valentine's Day. I was stressing out over that...unnecessarily.  In the end, I decided to actually finish by lesson on Hebrews instead. The craft projects can wait...and these will eventually turn into a work of art. Oh, and it's NEVER too late to give a Valentine's Gift.

I'm really working on embracing the whole idea of being a Proverbs 31 and Titus 2 lady...oh, make that "single" lady. You know what?  These are things that are great for any woman, no matter what your station in life might be.  So pray for me, encourage me, and feel free to leave any tips etc here in the comment box ;) :) Also, please check out my sidebar for some links to the various blogs hosting link-ups throughout the week :)

Join me tomorrow for another episode of my "It Makes Cents to Me" Friday :) :)  I am looking into subscribing to the local paper, just so I can get the coupon inserts.

It's a beautiful, bright sunny day today. It's also a little  chilly outside.  Luckily, I'm INSIDE watching episodes of the Canadian tv series "Heartland" on Netflix, and working on this blog post at the same time.  That's the news from the ocean shores of California today. Love and hugs, Heather :)